리눅스 / 파이썬 패키지 및 이미지 저장소 구성
오프라인(폐쇄망) 환경에서 Kubespray를 사용해 Kubernetes 클러스터를 설치하려면 크게 3가지 요소가 내부망에 준비되어야 한다.
OS 패키지 (YUM/DNF)kubeadm, kubelet, kubectl 및 필수 시스템 유틸리티
컨테이너 이미지 (Registry)- K8s 컴포넌트(
api-server, etcd), CNI(calico), DNS(coredns) 등
- 파이썬 패키지
- Kubespray의 기반이 되는 Ansible 실행을 위한 의존성 라이브러리
미러 YUM/DNF 리포지토리
인터넷이 되는 admin 노드에서 필요한 모든 RPM 패키지와 의존성 메타데이터를 다운로드(reposync)하여 Nginx를 통해 웹 서버로 배포하는 과정이다.
admin
1
| dnf install -y dnf-plugins-core createrepo nginx
|
1
2
| mkdir -p /data/repos/rocky/10
cd /data/repos/rocky/10
|
- BaseOS, AppStream, Extras 동기화
--download-metadata 옵션은 패키지 간의 의존성 정보가 담긴 repodata/를 함께 받아온다. 이 옵션이 없으면 나중에 k8s-node에서 패키지 설치 시 의존성 계산을 하지 못해 에러가 발생한다.
1
2
3
4
5
6
| dnf reposync --repoid=baseos --download-metadata -p /data/repos/rocky/10
du -sh /data/repos/rocky/10/baseos/
dnf reposync --repoid=appstream --download-metadata -p /data/repos/rocky/10
dnf reposync --repoid=extras --download-metadata -p /data/repos/rocky/10
|
1
2
3
4
5
6
7
8
9
10
11
12
13
| cat <<EOF > /etc/nginx/conf.d/repos.conf
server {
listen 80;
server_name repo-server;
location /rocky/10/ {
autoindex on; # 디렉터리 목록 표시
autoindex_exact_size off; # 파일 크기 KB/MB/GB 단위로 보기 좋게
autoindex_localtime on; # 서버 로컬 타임으로 표시
root /data/repos;
}
}
EOF
|
1
2
3
4
5
6
7
| systemctl enable --now nginx
systemctl status nginx.service --no-pager
ss -tnlp | grep nginx
# 접속 테스트
curl http://192.168.10.10/rocky/10/
open http://192.168.10.10/rocky/10/baseos/
|
1
| systemctl disable --now nginx && dnf remove -y nginx
|
k8s-node
기존에 인터넷을 바라보던 기본 repo 설정들을 비활성화(백업)하고, 우리가 방금 admin 노드에 구축한 Nginx 웹 서버를 바라보도록 설정한다.
1
2
3
| tree /etc/yum.repos.d/
mkdir /etc/yum.repos.d/backup
mv /etc/yum.repos.d/*.repo /etc/yum.repos.d/backup/
|
- 로컬 레포 파일 생성
- 서버 IP는 Repo 서버의 IP로 수정
- NF 클라이언트는 HTTP, HTTPS, FTP, file(로컬 파일시스템 직접 접근) 프로토콜로 저장소에 접근할 수 있다.
1
2
3
4
5
6
7
8
9
10
11
12
13
14
15
16
17
18
19
| cat <<EOF > /etc/yum.repos.d/internal-rocky.repo
[internal-baseos]
name=Internal Rocky 10 BaseOS
baseurl=http://192.168.10.10/rocky/10/baseos
enabled=1
gpgcheck=0
[internal-appstream]
name=Internal Rocky 10 AppStream
baseurl=http://192.168.10.10/rocky/10/appstream
enabled=1
gpgcheck=0
[internal-extras]
name=Internal Rocky 10 Extras
baseurl=http://192.168.10.10/rocky/10/extras
enabled=1
gpgcheck=0
EOF
|
1
2
3
| dnf clean all
dnf repolist
dnf makecache
|
1
| dnf install -y nfs-utils
|
- 패키지 정보에 repo 확인
From repo 항목에 internal-baseos 등이 찍힌다면 내부망 구축에 성공한 것이다.
1
| dnf info nfs-utils | grep -i repo
|
프라이빗 이미지 레지스트리 구성
쿠버네티스 구동에 필요한 컨테이너 이미지들을 저장할 로컬 레지스트리를 구축한다. Rocky Linux에 기본 탑재된 podman을 사용하며, Docker 공식 레지스트리 이미지를 활용해 사설 저장소를 띄운다
podman은 기본적으로 설치되어있으며 아래 명령어로 확인해본다.
1
2
| dnf install -y podman
dnf info podman | grep repo
|
1
2
3
4
5
| which podman
podman --version
podman info
cat /etc/containers/registries.conf
cat /etc/containers/registries.conf.d/000-shortnames.conf
|
admin
1
2
| podman pull docker.io/library/registry:latest
podman images
|
- Registry 데이터 저장 디렉터리 준비
- 레지스트리에 수십 개의 K8s 이미지가 푸시되면 디스크 용량을 꽤 많이 차지한다. 실무에서는
/data와 같이 별도로 마운트된 여유 있는 파티션을 사용하는 것이 안전하다.
1
2
| mkdir -p /data/registry
chmod 755 /data/registry
|
1
2
| podman run -d --name local-registry -p 5000:5000 -v /data/registry:/var/lib/registry --restart=always docker.io/library/registry:latest
|
1
2
3
| podman ps
ss -tnlp | grep 5000
pstree -a
|
1
| curl -s http://localhost:5000/v2/_catalog | jq
|
- 컨테이너 이미지 저장소 Docker Registry 에 이미지 push하기
1
| cat /etc/containers/registries.conf.d/000-shortnames.conf | grep alpine
|
1
2
| podman images
podman tag alpine:latest 192.168.10.10:5000/alpine:1.0
|
1
| podman push 192.168.10.10:5000/alpine:1.0
|
- 기본적으로 컨테이너 엔진들은 HTTPS를 요구한다. 내부망에서 HTTP로 테스트하려면 Registry 주소를 ‘안전하지 않은 저장소’로 등록해야 한다.
1
2
3
4
5
6
7
| cp /etc/containers/registries.conf /etc/containers/registries.bak
cat <<EOF >> /etc/containers/registries.conf
[[registry]]
location = "192.168.10.10:5000"
insecure = true
EOF
grep "^[^#]" /etc/containers/registries.conf
|
1
| podman push 192.168.10.10:5000/alpine:1.0
|
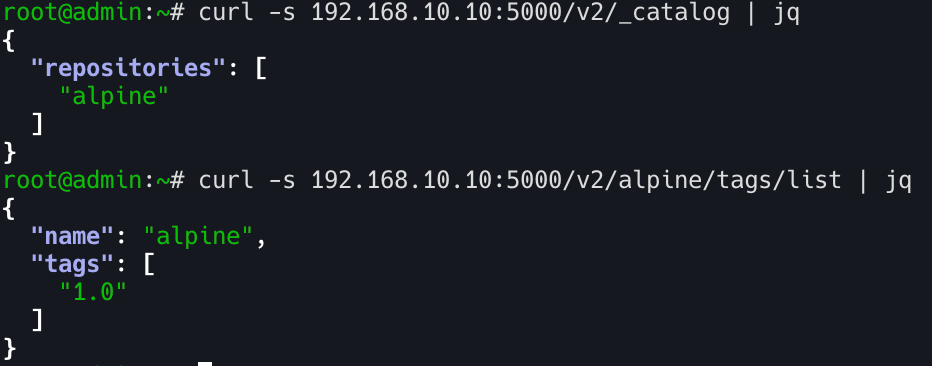
1
2
| curl -s 192.168.10.10:5000/v2/_catalog | jq
curl -s 192.168.10.10:5000/v2/alpine/tags/list | jq
|
(정리)
1
2
| podman rm -f local-registry
mv /etc/containers/registries.bak /etc/containers/registries.conf
|
k8s-node
k8s-node에서도 admin 노드의 사설 레지스트리에서 이미지를 Pull 받을 수 있도록 insecure 설정을 동일하게 적용해 준다.
1
2
3
4
5
6
7
| cp /etc/containers/registries.conf /etc/containers/registries.bak
cat <<EOF >> /etc/containers/registries.conf
[[registry]]
location = "192.168.10.10:5000"
insecure = true
EOF
grep "^[^#]" /etc/containers/registries.conf
|
1
2
| podman pull 192.168.10.10:5000/alpine:1.0
podman images
|
(정리)
1
| mv /etc/containers/registries.bak /etc/containers/registries.conf
|
프라이빗 PyPI(Python Package Index) 미러 저장소 구축
K8s 설치 도구인 Kubespray는 Ansible 기반이다. Ansible이 원격 노드에 접속하고 작업을 수행하기 위해서는 jinja2, netaddr, cryptography 등 수많은 파이썬 라이브러리에 강하게 의존한다. 폐쇄망에서 pip install이 실패하면 설치 자체가 시작되지 않으므로, devpi를 이용해 로컬 PyPI 인덱스를 제공해야 한다.
admin
1
2
| pip install devpi-server devpi-client devpi-web
pip list | grep devpi
|
1
2
| devpi-init --serverdir /data/devpi_data
ls -al /data/devpi_data/
|
1
| nohup devpi-server --serverdir /data/devpi_data --host 0.0.0.0 --port 3141 > /var/log/devpi.log 2>&1 &
|
1
2
3
4
| ss -tnlp | grep devpi-server
tail -f /var/log/devpi.log
open http://192.168.10.10:3141
|
1
2
3
| devpi use http://192.168.10.10:3141
devpi login root --password ""
pip download jmespath netaddr -d /tmp/pypi-packages
|
1
2
3
4
5
6
7
8
9
| devpi index -c prod bases=root/pypi
devpi index -l
devpi use root/pypi
devpi use root/prod
devpi upload /tmp/pypi-packages/*
devpi list
|
(자원 정리)
1
| pkill -f "devpi-server --serverdir /data/devpi_data”
|
k8s-node
방안1 일회성 사용
1
2
3
| pip list | grep -i jmespath
pip install jmespath --index-url http://192.168.10.10:3141/root/prod/+simple --trusted-host 192.168.10.10
pip list | grep -i jmespath
|
(방안2) 전역 설정
Kubespray 실행 시 수십 개의 패키지를 설치해야 하므로 매번 옵션을 주는 대신 전역 설정(pip.conf)을 세팅하는 것이 효율적이다.
- /root/prod (사람용 웹 UI)
- /root/prod/+simple (pip 전용 API 엔드포인트)
pip 설정에서 반드시 +simple이 붙은 URL을 써야 정상 동작한다. pip는 패키지 저장소를 탐색할 때 PEP 503 “Simple API” 형식으로 접근하기 때문이다. +simple 엔드포인트는 패키지 목록을 pip가 파싱하고 이해할 수 있는 HTML 디렉터리 포맷으로 제공하는 역할을 한다.
1
2
3
4
5
6
| cat <<EOF > /etc/pip.conf
[global]
index-url = http://192.168.10.10:3141/root/prod/+simple
trusted-host = 192.168.10.10
timeout = 60
EOF
|
1
2
| pip list | grep -i netaddr
pip install netaddr
|
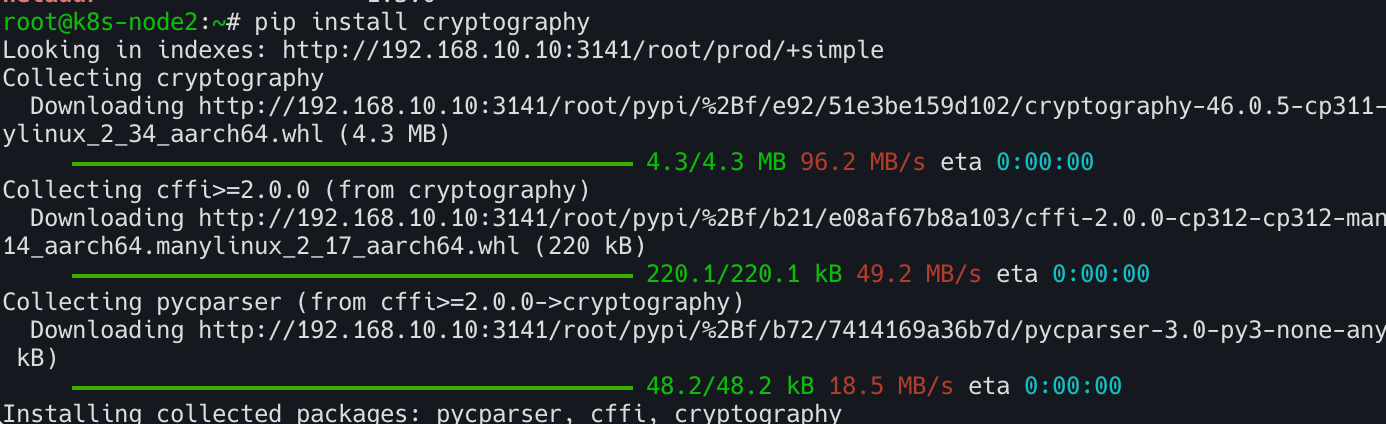
1
| pip install cryptography
|
(자원 정리)