[Cilium Study 1기 by Gasida] 2주차 - 도전과제2 Configure TLS with Hubble
Configure TLS with Hubble
Hubble API에서 TLS 활성화
허블 릴레이가 배포되면 허블은 호스트 네트워크의 TCP 포트에서 수신대기한다. 이를 통해 허블 릴레이는 클러스터 내의 모든 허블 인스턴스와 통신 할 수 있다. 허블 인스턴스와 허블릴레이 간의 연결은 기본적으로 mTLS를 사용하여 보호된다.
TLS인증서 구성
인증서 교체 방법은 여러가지가 존재하지만 최종적으로 key쌍이 포함된 비밀정보가 업데이트 된다. 허블 서버와 허블 릴레이는 CA인증서를 포함한 TLS 인증서의 핫 re-loading을 지원하므로 기존 연결은 끊어지지않는다. 허블 서버나 릴레이를 다시 시작 할 필요 없이 새 인증서를 사용하여 자동으로 새연결이 설정된다.
Helm을 이용한 인증서 설치 (다양한 방법이 존재)
Helm을 사용하는 경우 설치나 업그레이드를 위해 Helm을 사용할 때마다 TLS 인증서가 다시 생성된다. Helm 방식의 단점은 인증서가 자동으로 생성되지만 자동으로 갱신되지는 않는다는 점이다. 따라서 인증서가 만료되기 직전에 helm upgrade hubble.tls.auto.certValidityDuration 실행을 해주어야한다.
1
2
3
4
5
6
7
8
9
10
11
# Cilium Helm 리포지토리를 추가하고 업데이트
helm repo add cilium https://helm.cilium.io/
helm repo update

helm upgrade cilium cilium/cilium --namespace kube-system --reuse-values \
--set hubble.enabled=true \
--set hubble.relay.enabled=true \
--set hubble.ui.enabled=true \
--set hubble.tls.auto.enabled=true \
--set hubble.tls.auto.method=helm \
--set hubble.tls.auto.certValidityDuration=1095
설치 검증
Hubble TLS가 활성화 되었는지 그리고 Hubble Relay와 Hubble Server간의 연결이 mTLS를 사용하여 세션을 보호하는지 확인하는 방법이다. 만약 TLS구성에 문제가 생길 경우 아래 명령을 사용하여 문제를 해결할 수 있다.
올바르게 TLS가 구성되어있는지 확인하자
1
2
kubectl get configmap -n kube-system cilium-config -oyaml | grep hubble-disable-tls
# hubble-disable-tls: "false"면 OK

Hubble 구성 요소가 실행되는 namespace 내에 Hubble CLI 파드를 만들어 시작한다. (ex kube-system)
1
kubectl apply -n kube-system -f https://raw.githubusercontent.com/cilium/cilium/main/examples/hubble/hubble-cli.yaml
공식문서 yaml을 그대로 이용할시 이미지 풀링 에러가 발생한다. 해당 레포지토리에서 원하는
image버전을 찾아서 바꾸어주자.
전체 hubble-cli.yaml의 내용
1
2
3
4
5
6
7
8
9
10
11
12
13
14
15
16
17
18
19
20
21
22
23
24
25
26
27
28
29
30
31
32
33
34
35
36
37
38
39
40
41
42
43
44
45
46
47
48
49
50
51
52
53
54
55
56
---
apiVersion: apps/v1
kind: Deployment
metadata:
  name: hubble-cli
  namespace: kube-system
  labels:
    app.kubernetes.io/name: hubble-cli
spec:
  replicas: 1
  selector:
    matchLabels:
      app.kubernetes.io/name: hubble-cli
  template:
    metadata:
      labels:
        app.kubernetes.io/name: hubble-cli
    spec:
      containers:
      - name: hubble-cli
        image: quay.io/cilium/hubble:v1.16.4 # 공식문서버전 말고 최신버전으로 변경해줌
        ## 레포지토리 https://quay.io/repository/cilium/hubble?tab=tags&tag=v0.13.4@sha256:4487484557e9b4d4f33e21b7f52e6a644251c72a562e3a7a913fc2edde57edf3
        imagePullPolicy: IfNotPresent
        env:
          - name: HUBBLE_SERVER
            value: "$(HUBBLE_RELAY_SERVICE_HOST):$(HUBBLE_RELAY_SERVICE_PORT)"
        command:
          - tail
        args:
          - -f
          - /dev/null
        volumeMounts:
          - mountPath: /var/run/cilium
            name: hubble-sock-dir
            readOnly: true
          - mountPath: /var/lib/hubble-relay/tls
            name: tls
            readOnly: true
      restartPolicy: Always
      volumes:
      - hostPath:
          path: /var/run/cilium
          type: Directory
        name: hubble-sock-dir
      - name: tls
        projected:
          sources:
          - secret:
              name: hubble-relay-client-certs # 시크릿 이름
              items:
                - key: tls.crt
                  path: client.crt
                - key: tls.key
                  path: client.key
                - key: ca.crt
                  path: hubble-server-ca.crt
새롭게 생성된 파드 내에서 hubble watch peers 명령어를 실행함으로서 Hubble Server를 리스트해본다.
1
2
kubectl exec -it -n kube-system deployment/hubble-cli -- \
hubble watch peers --server unix:///var/run/cilium/hubble.sock

위의 그림과 같이 서버이름과 IP 주소를 메모하자. 출력에 TLS.ServerName이 없으면 허블 서버에 TLS가 활성화 되어 있지 않은 것이므로 다음 단계는 작동하지 않는다.

아래와 같이 k8s-w1 노드를 대상으로 Hubble Relay 클라이언트 인증서를 사용하여 올바르게 연결을 수락하는지 확인해보자. 성공적이다.
1
2
3
4
5
kubectl exec -i -n kube-system deployment/hubble-cli -- \
openssl s_client -showcerts -servername ${SERVERNAME} -connect ${IP?}:4244 \
  -CAfile /var/lib/hubble-relay/tls/hubble-server-ca.crt \
  -cert /var/lib/hubble-relay/tls/client.crt \
  -key /var/lib/hubble-relay/tls/client.key

client certificate를 제공하지 않고 허블 서버에 질의 해본다. 당연하게도 인증서를 요구하면서 실패한다.

TLS없이 시도해보자. 역시나 커넥션에러가 발생한다.
1
2
$ kubectl exec -it -n kube-system deployment/hubble-cli -- \
hubble observe --server ${IP?}:4244

커넥션 문제해결
Hubble CLI 파드에서 OpenSSL을 설치 후 Hubble 서버에 연결한다. TLS 핸드쉐이크에 대한 자세한 내용을 확인하여 디버깅할 수 있다.
먼저 Hubble CLI파드에 접속후 openssl을 설치한다.
1
kubectl exec -it -n kube-system deployment/hubble-cli -- apk add --update openssl

파드내에서 클라이언트 인증서가 없는 실패할 커넥션을 시도해본다.
1
2
3
kubectl exec -it -n kube-system deployment/hubble-cli -- \
openssl s_client -showcerts -servername ${SERVERNAME} -connect ${IP?}:4244 \
-CAfile /var/lib/hubble-relay/tls/hubble-server-ca.crt
출력결과 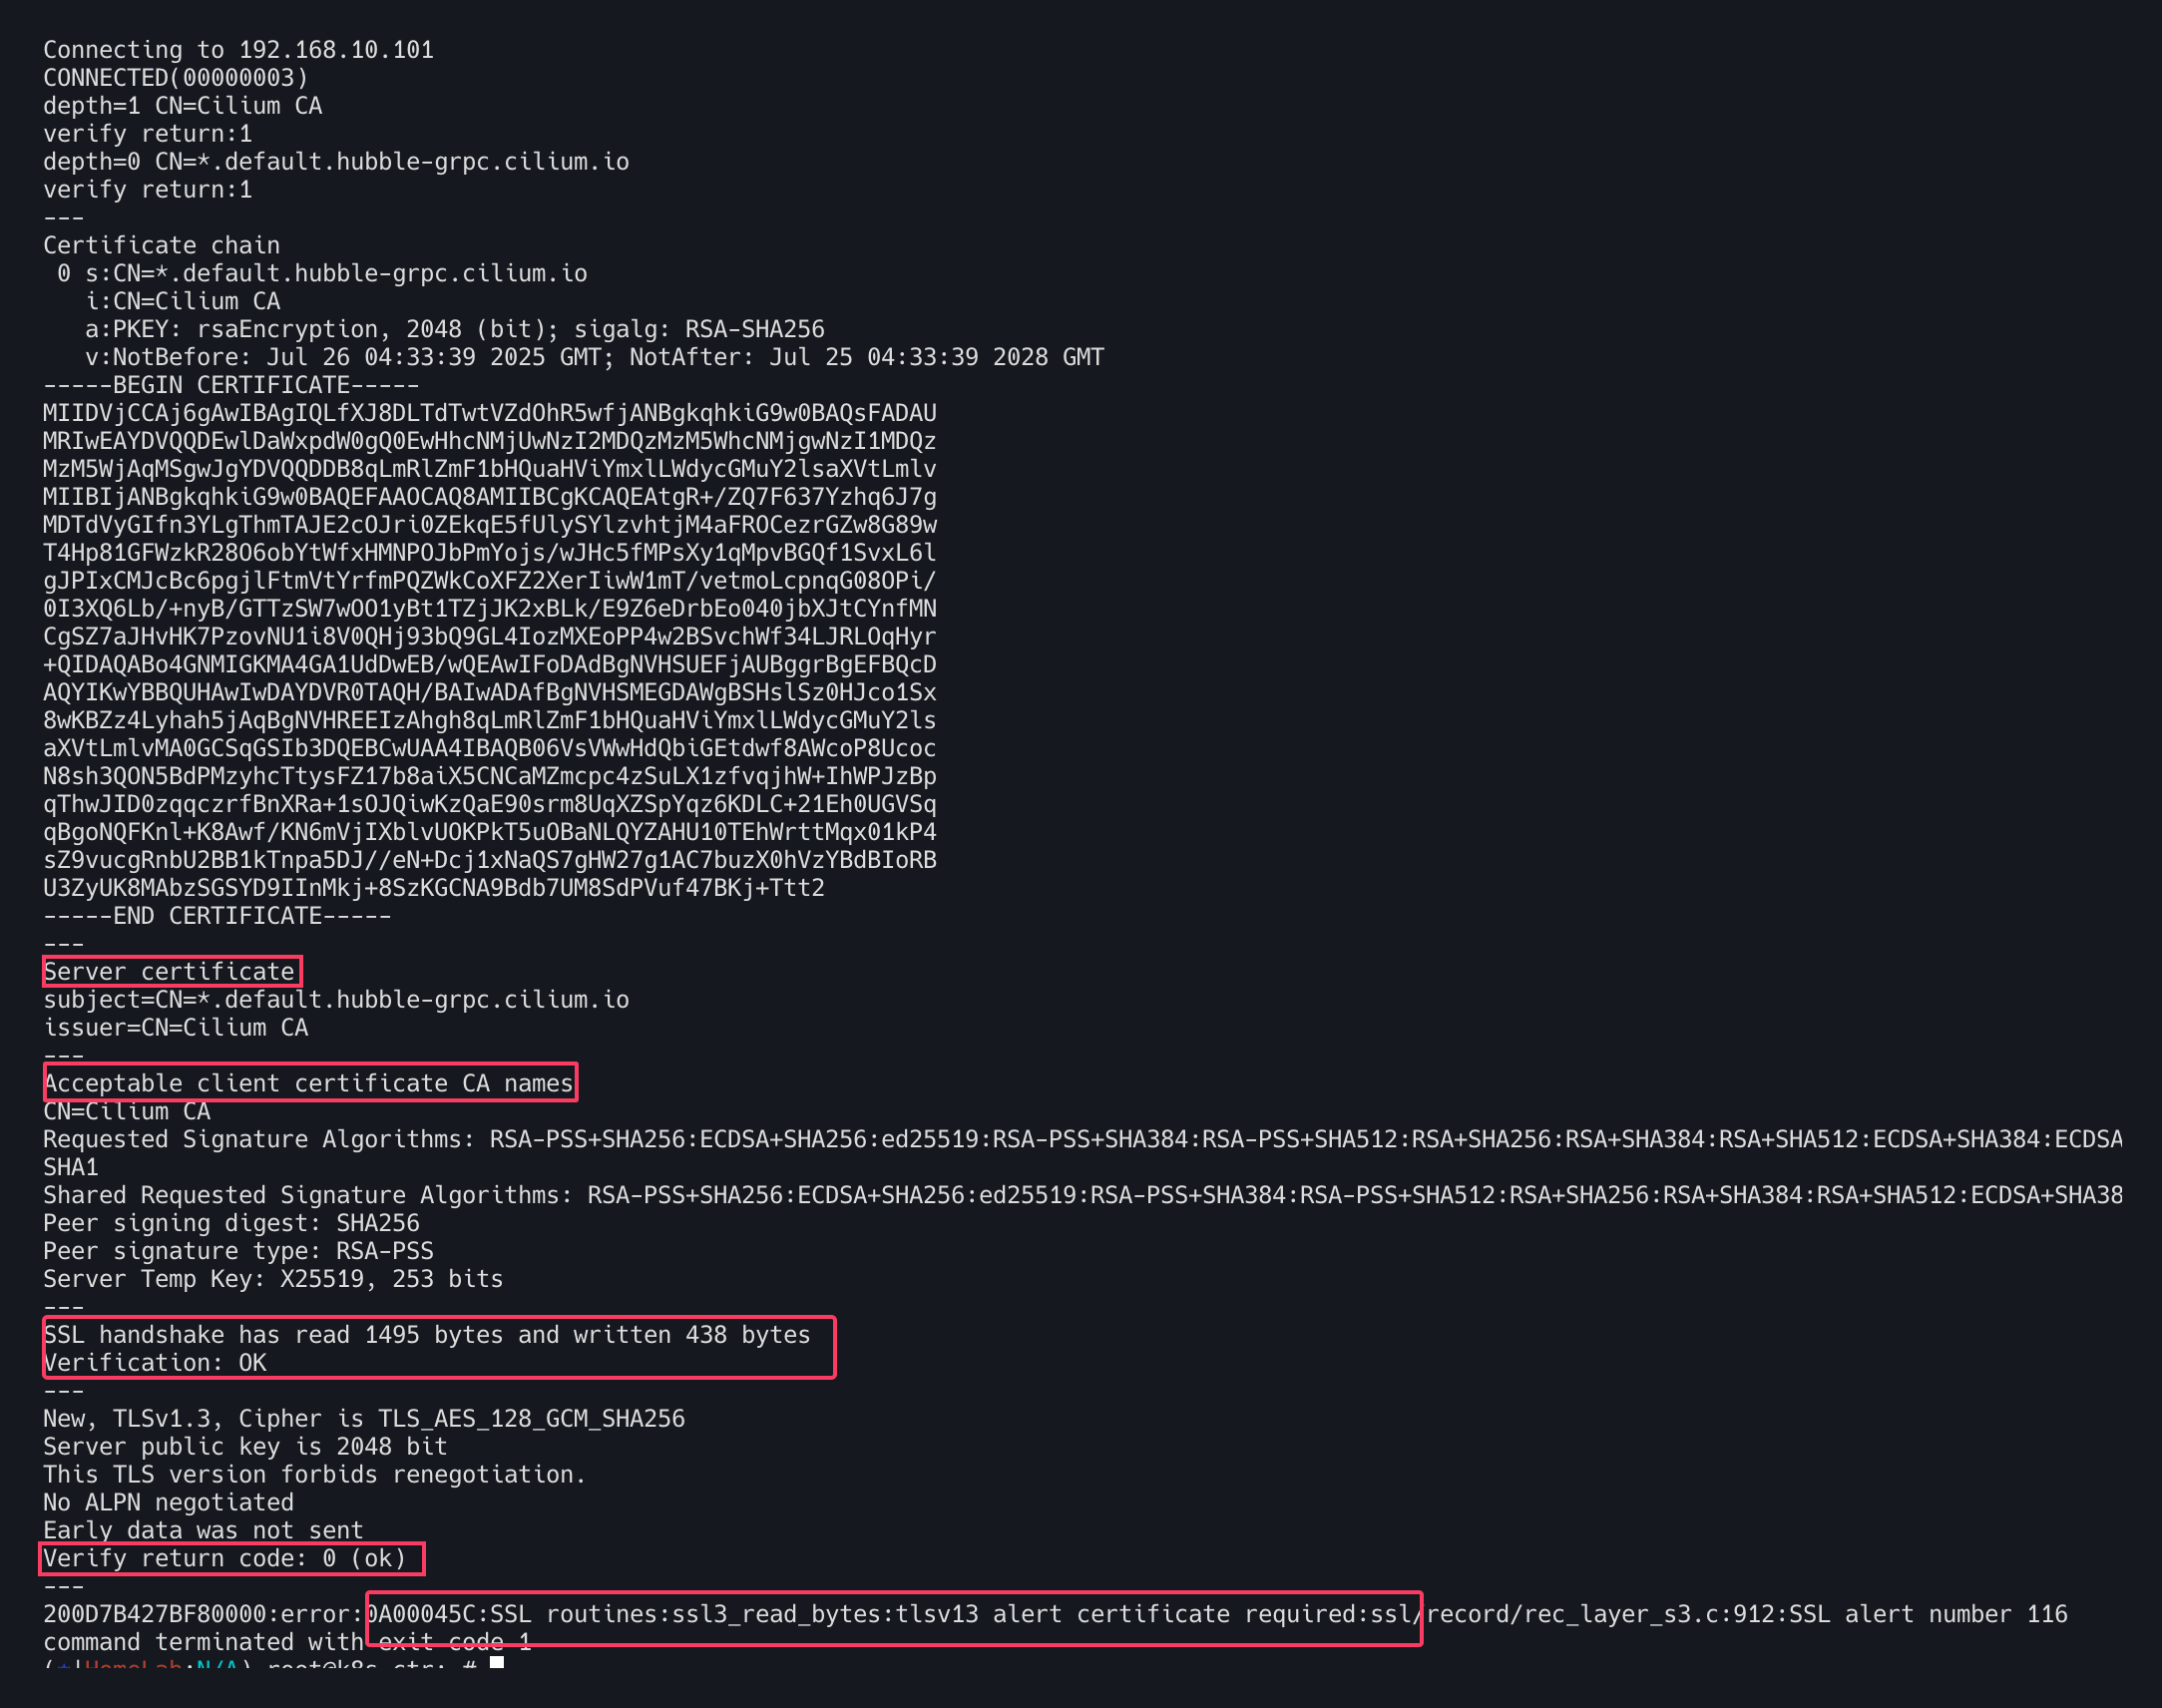
Server Certificate: 이는 서버가 제시하는 서버 인증서Acceptable client certificate CA names: 서버가 클라이언트 인증서에 대해 허용하는 CA 이름SSL handshake has read 1108 bytes and written 387 bytes: 핸드셰이크에 대한 세부 정보. 오류가 발생할 경우 여기에 표시될 수 있다.Verification: OK: 서버 인증서가 유효Verify return code: 0 (ok): 서버 인증서가 성공적으로 확인error:0A00045C:SSL routines:ssl3_read_bytes:tlsv13 alert certificate required: 서버에 클라이언트 인증서가 필요 클라이언트 인증서가 제공되지 않아 연결에 실패
올바른 클라이언트 인증서와 키를 함께 연결을 시도한다.
1
2
3
4
5
kubectl exec -i -n kube-system deployment/hubble-cli -- \
openssl s_client -showcerts -servername ${SERVERNAME} -connect ${IP?}:4244 \
  -CAfile /var/lib/hubble-relay/tls/hubble-server-ca.crt \
  -cert /var/lib/hubble-relay/tls/client.crt \
  -key /var/lib/hubble-relay/tls/client.key
정상연결이 되었으며 오류메세지가 없다. 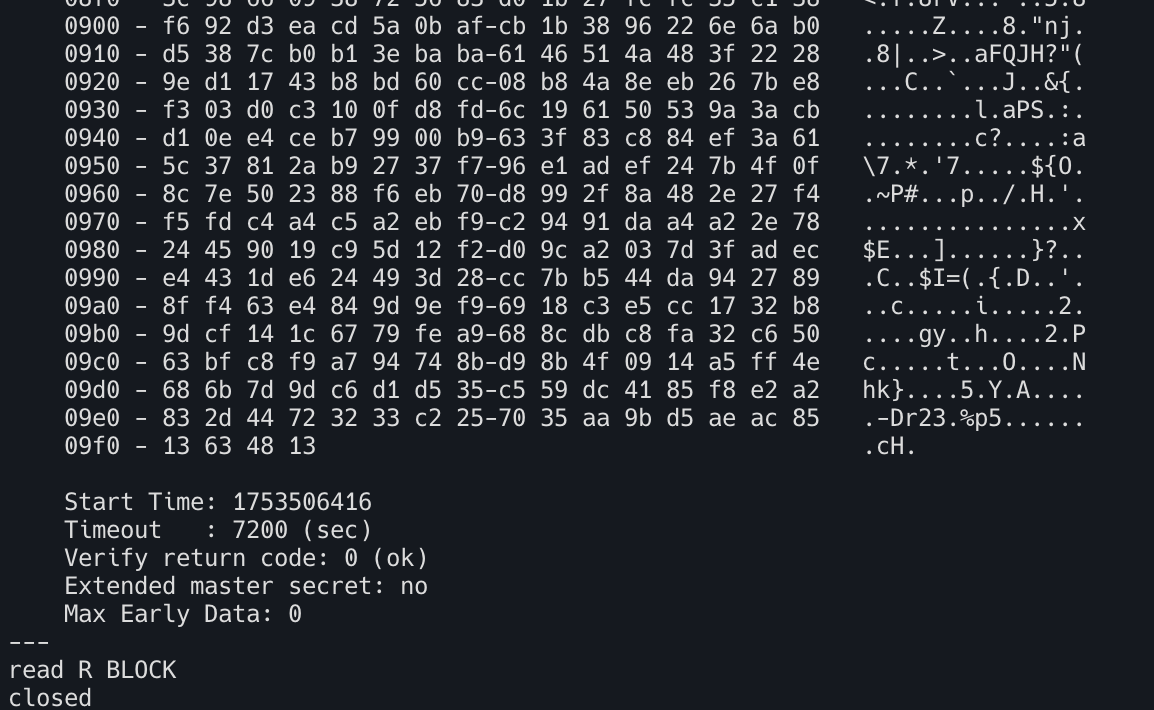
중간에 아래와 같은 Post-Handshake New Session Ticket arrived라는 섹션이 있는데 이 섹션이 있으면 클라이언트 인증서가 유효하고 TLS 세션이 설정되었음을 나타낸다. 연결이 종료된 후 출력되는 TLS 세션 요약도 TLS 세션의 지표로 활용할 수 있다. 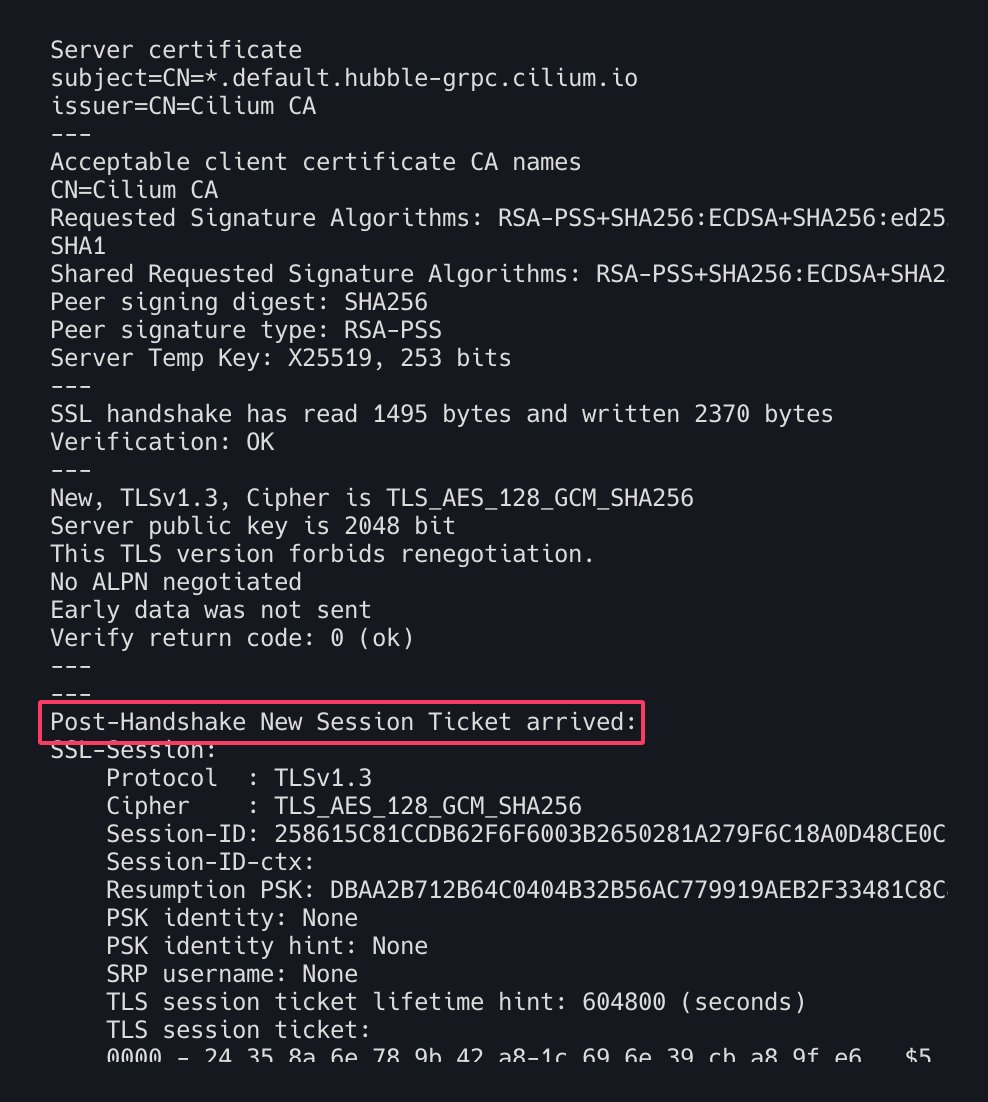
Hubble Metrics TLS 그리고 인증
Cilium 1.16 부터 Hubble은 Hubble observer API 외에도 Hubble metrics API에서 TLS를 구성을 지원한다.
활성화 하기 위해서는 옵션목록에 아래와 같은 Helm 플래그를 추가한다.
1
--set hubble.metrics.tls.enabled=true # Enable TLS on the Hubble metrics API